The Short Answer: Place purifiers 3-5 feet from your breathing zone, near pollution sources, with unobstructed airflow. Avoid corners and curtains. For bedrooms, position near the bed but not blowing directly on you.
You just brought home a new air purifier. Exciting, cleaner air, fewer allergens, better sleep. But before you rip open the box and hit the power button, there are a handful of critical setup steps that separate “this thing actually works” from “I spent $200 on a noisy paperweight.” Miss even one, and you could go weeks without realizing your purifier isn’t doing its job.
This guide walks you through every step: from the unboxing mistake that trips up nearly everyone, to room-by-room placement strategy, to knowing exactly what the air quality indicator should show during your first 48 hours. Bookmark this page, you’ll want to reference it again when your replacement filters arrive.
Setup Checklist: Step-by-Step
Before you touch anything, run through this numbered checklist. Print it out or keep it on your phone.
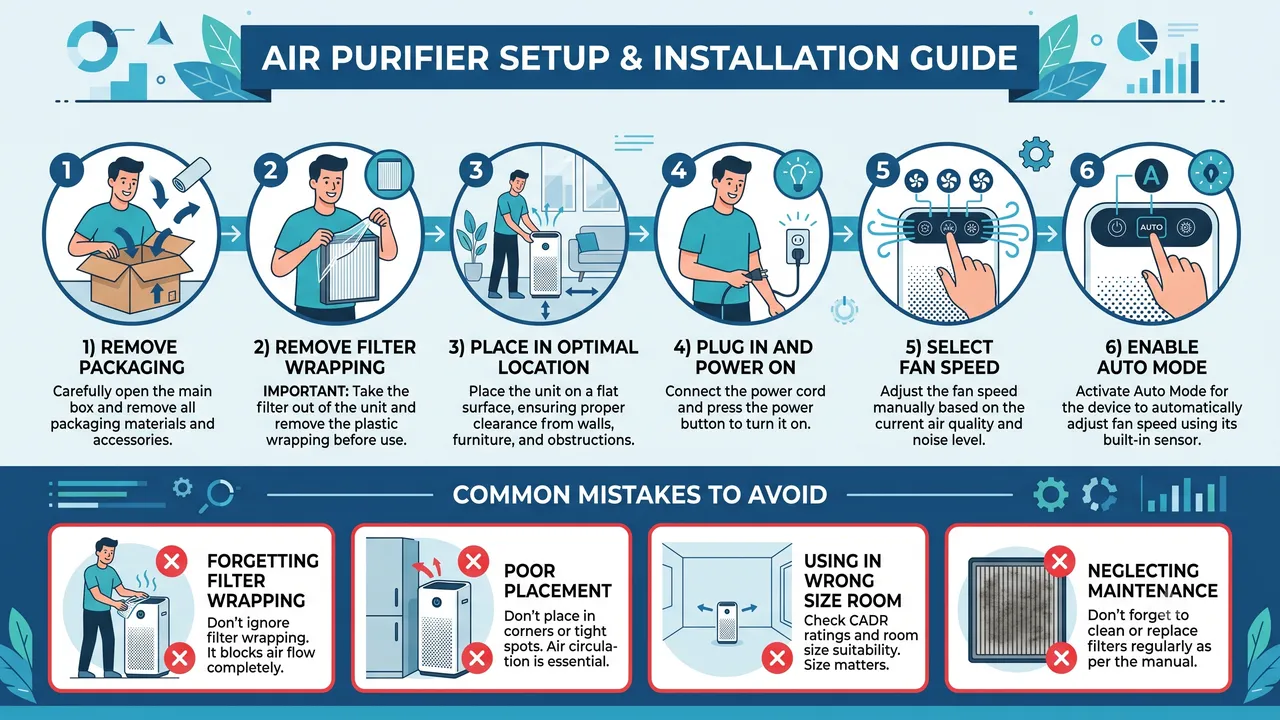
1. Unbox and Inspect All Components Remove the purifier, filters, power cord, and any accessories from the box. Check for shipping damage, dented panels, cracked filter frames, or loose internal parts. If anything is damaged, contact the manufacturer before powering on. Our air purifier warranty guide covers what’s typically covered under warranty.
2. Remove ALL Plastic Wrapping from Filters This is the step people forget, and it’s the single most common reason a brand-new purifier “doesn’t work.” Every filter ships sealed in plastic to preserve carbon freshness and prevent contamination during transit. Open every access panel on the unit. Pull out every filter. Unwrap every plastic bag, including the clear cellophane film that’s sometimes folded tightly inside the filter frame itself. Look twice. The plastic is stiff and can be mistaken for part of the filter housing.
3. Reinstall Filters in the Correct Order Check your manual for the specific order. Most multi-stage purifiers follow: pre-filter → activated carbon filter → HEPA filter. Some models combine stages into a single unit. The arrow on the filter frame typically indicates airflow direction, it should point into the unit, not out.
4. Close All Access Panels Securely Most purifiers have a safety interlock that prevents operation if a panel is open or a filter isn’t seated properly. If the unit won’t power on, check this first.
5. Choose Your Placement Location Follow the placement rules in the next section. Measure the clearance from walls with a tape measure, don’t eyeball it. Plug the unit in at your chosen spot.
6. Power On and Set to Maximum Speed Run the purifier on its highest fan speed for the first 2 to 4 hours. This performs an initial deep clean of the room’s air, cycling the entire air volume multiple times. After this initial period, switch to auto mode (if available) or medium speed for everyday use.
7. Connect to WiFi (Smart Purifiers Only) If your purifier has smart features, connect it to your home WiFi during initial setup, not later. The firmware update that runs on first connection often fixes sensor calibration issues and improves auto-mode responsiveness. See the Smart Purifier WiFi Setup Guide section below.
8. Verify the Air Quality Indicator After 30 to 60 minutes on high, the air quality sensor should begin showing improvement. If your unit has a color-coded display, expect it to shift from red or yellow toward blue or green. If there’s no change after 4 hours, see the troubleshooting section below.
9. Set Your Ongoing Schedule Decide whether you’ll run the purifier 24/7 (recommended for allergy sufferers and homes with pets) or on a timer. Check out our guide to leaving your air purifier on while away for energy-conscious tips.
10. Note the Date for Filter Replacement Write down today’s date and set a reminder for your first filter check. Most HEPA filters last 6 to 12 months; carbon filters may need replacing sooner. Our replacement filter guide breaks down OEM vs. third-party options.
Optimal Placement by Room Type
Where you put your purifier matters as much as which one you buy. Follow the general rule: at least 12 inches from walls for rear-intake units, 6 inches for side-intake or 360-degree models, with the clean air output directed toward the center of the room. Here’s how that translates room by room.
| Room Type | Best Placement | Why It Works | Special Considerations |
|---|---|---|---|
| Bedroom | Between the bed and the door, 2–4 feet from the bed | Door is where outside air enters; purifier intercepts particles before they reach the sleeping area | Choose a quiet model for bedrooms, noise above 40 dB disrupts sleep |
| Living Room | Near the center or along the main traffic path, away from walls | Living rooms are the largest common room; central placement maximizes coverage for the CADR rating | Avoid placing behind the TV or entertainment center where heat can affect sensors |
| Nursery / Baby Room | Against the wall closest to the door, 3 feet from the crib | Intercepts air entering from the hallway; distance from crib prevents direct draft on the baby | See our nursery air purifier guide for safe model recommendations |
| Kitchen | On the counter or a shelf near (but not directly next to) the stove | Captures cooking particulates and grease aerosols before they spread through the home | Pair with a range hood for best results, our kitchen air quality guide explains why |
| Home Office | On the desk or floor within 4 feet of your seating position | You breathe the most concentrated air in your immediate zone; closer is better for personal protection | Helpful for chemical sensitivity from printer toner and office supplies |
| Basement | Near the center, elevated on a table or shelf if possible | Basements trap heavier-than-air pollutants; elevation helps the purifier capture rising warm air | Monitor humidity, excess moisture affects filter life. See our humidity interaction guide |
| Open Plan / Large Room | As close to the center as practical, or multiple units at opposite ends | Single units may be undersized for open floor plans; check the CADR matches your square footage | Our open-plan office guide covers large-space strategies |
For a deeper dive into the physics of airflow and purifier positioning, see our full Air Purifier Placement Guide.
First 48 Hours: What to Expect
Your first two days with a new air purifier follow a predictable pattern. Knowing what to look for helps you confirm the unit is working, and spot problems early.
Hours 1–4: The Initial Sweep
If your purifier has an air quality indicator (most mid-range and premium models do), you’ll see it shift from red or yellow to green or blue as particulate counts drop. You may notice reduced odors from cooking, pets, or off-gassing furniture. The fan will be loud on high, this is normal and temporary. Don’t judge noise levels by the first few hours; you’ll run on low or auto 95% of the time going forward.
Hours 4–24: Visible Changes
By the end of the first day, you should notice less visible airborne dust, especially in direct sunlight or under bright overhead lights. If you have pets, the air near their bedding or favorite spots may smell noticeably cleaner. The purifier should settle into auto mode with the fan dropping to a lower speed as air quality improves.
Days 1–2: Sensory Shifts
The air may feel “lighter” or “fresher.” This isn’t your imagination, it’s the measurable reduction in particulate concentration. People with mild allergies often report less nasal congestion by the second morning. If you track your home’s air quality with a separate monitor, you should see PM2.5 readings drop significantly.
Days 3–14: Health and Surface Improvements
Allergy symptoms like sneezing, itchy eyes, and congestion may begin improving noticeably. Surface dust accumulation on furniture, shelves, and electronics slows down. This is your purifier intercepting particles that would otherwise settle on every surface.
After 2 Weeks: The Reality Check
Inspect the pre-filter. If you see visible dust, hair, and debris, the purifier is doing its job, all that material would have been in your lungs. If the pre-filter is still pristine and your air quality indicator hasn’t improved, something else is going on. Check for:
- An active pollution source: Open windows, a nearby construction site, a gas stove running without a hood, or pets you didn’t account for when sizing the unit.
- An undersized purifier: The CADR rating may not match your room’s square footage. Use our CADR calculator tool to verify.
- A dirty sensor: Air quality sensors accumulate dust over time. Gently clean the sensor opening with a dry cotton swab (consult your manual for the sensor location).
- Poor room sealing: Gaps under doors, leaky windows, or an open return vent can overwhelm a single purifier with untreated air.
Common Setup Mistakes
These are the errors we see most frequently, and the fixes are simple once you know what to look for.
Mistake 1: Forgetting to Remove the Filter Plastic
The number one mistake. People have run purifiers for weeks, even months, with the plastic still on. The unit runs, air blows out the top, but almost no air actually passes through the filter. The plastic is sometimes clear, sometimes folded so tightly it feels like part of the filter frame. Pull every filter out and double-check.
Mistake 2: Pushing the Purifier Against a Wall
Most purifiers pull air from the sides or back. Pressing one flush against a wall starves the intake by 50% or more. Even 6 inches of clearance makes a measurable difference in airflow. Measure it once with a tape measure and stop guessing.
Mistake 3: Placing It in a Corner
Two walls restrict two intake sides. A corner placement can reduce effective CADR by 30–40%. If you must use a corner, choose a 360-degree intake model (like cylinder-filter designs) that pulls air from all directions.
Mistake 4: Running on Low 24/7 From Day One
Many buyers default to the quietest setting immediately. The problem: on low, most purifiers need 6–8 full air changes to clean a room, that’s hours, not minutes. Always run on high for the first deep clean, then dial down.
Mistake 5: Ignoring Room Size vs. CADR
A purifier rated for 200 sq ft won’t meaningfully improve air quality in a 500 sq ft living room. Check the manufacturer’s recommended room size and compare it to your actual room dimensions. When in doubt, size up. Our buying guide for first-time buyers covers how to match CADR to room size.
Mistake 6: Blocking the Air Output
Stacking books, papers, or decorative items on top of the purifier’s exhaust vent restricts clean air distribution. Leave the top and all output vents completely clear.
Mistake 7: Forgetting to Check Filter Orientation
Most filters have an airflow direction arrow printed on the frame. Installing a filter backward means the pre-filter stage catches nothing while the HEPA layer faces raw, unfiltered air, reducing its lifespan significantly.
Smart Purifier WiFi Setup Guide
If your air purifier has WiFi connectivity (common in models from Coway, Winix, Levoit, Blueair, and Dyson), setting it up during initial unboxing is strongly recommended. Here’s how to do it right.
Before You Start
- Ensure your phone is connected to your home’s 2.4 GHz WiFi network. Most purifiers do not support 5 GHz, if your router broadcasts both on the same SSID, temporarily disable the 5 GHz band or create a separate 2.4 GHz network during setup.
- Download the manufacturer’s app before unboxing. Common apps: Winix Smart, VeSync (Levoit), Blueair, Dyson Link, Coway IoCare.
- Have your WiFi password ready.
Step-by-Step WiFi Setup
- Power on the purifier and wait for it to complete its startup sequence (usually 10–15 seconds).
- Put the purifier in pairing mode. This varies by brand, typically holding the WiFi or power button for 5–10 seconds until a light flashes. Check your manual for the exact button combination.
- Open the manufacturer’s app and tap “Add Device” or the ”+” icon.
- Select your purifier model from the device list. The app will scan for nearby devices in pairing mode.
- Enter your WiFi credentials when prompted. Use the 2.4 GHz network.
- Wait for the connection to complete. The app will confirm when the purifier is online. This usually takes 30–60 seconds.
- Allow the firmware update to run. The first connection almost always triggers a firmware download. Do not interrupt this process. It may take 5–15 minutes. The purifier may restart automatically.
- Test the app controls. Adjust fan speed, check the air quality reading, and verify the filter life indicator from the app. If anything doesn’t respond, try a factory reset through the app and repeat the pairing process.
Troubleshooting WiFi Issues
- Purifier won’t enter pairing mode: Unplug for 30 seconds, plug back in, and try the button sequence again.
- App can’t find the purifier: Make sure Bluetooth is enabled on your phone, many apps use Bluetooth for initial discovery, then switch to WiFi.
- Connection drops frequently: Move the purifier closer to your router, or add a WiFi extender. Air purifiers are not heavy data users, but a weak signal causes disconnections.
- App wants you to create an account: Unfortunately, most manufacturer apps require an account. If this bothers you, many purifiers work perfectly fine without WiFi, the app is a convenience, not a requirement.
Privacy Note
Smart purifiers collect usage data including runtime hours, air quality readings, and sometimes room occupancy patterns (models with built-in sensors). Review the app’s privacy settings and disable any data sharing you’re uncomfortable with. The purifier’s core function, filtering air, works identically with or without the app connected.
Frequently Asked Questions
Can I use my air purifier in a room smaller than the rated square footage?
Yes, absolutely. A purifier rated for 350 sq ft works even better in a 200 sq ft room, it cycles the air more frequently. The only downside is that auto mode may run the fan at a lower speed than necessary, since the sensor reads clean air faster. In a smaller room, manually setting the fan to low or medium often gives better results than relying on auto mode.
Should I leave my air purifier on 24/7?
For allergy sufferers, pet owners, and anyone concerned about long-term air quality, yes, run it continuously. Air purifiers are designed for continuous operation and use relatively little electricity (typically 30–60 watts on low, comparable to a light bulb). Running it only when you’re home means the air quality resets every time you leave and return. See our guide on running purifiers while away for more detail.
How do I know if my air purifier is actually working?
Beyond the air quality indicator, you can verify performance by checking the pre-filter for visible debris after 2 weeks, measuring surface dust accumulation on a nearby shelf, or using a standalone PM2.5 air quality monitor before and after running the purifier. Our dedicated guide on testing whether your purifier works covers several methods, including the incense test and the white cloth test.
Do I need an air purifier if I already have a good HVAC filter?
They serve different purposes. An HVAC filter protects your heating and cooling system from dust buildup, its primary job isn’t cleaning the air you breathe. Even a MERV-13 HVAC filter operates at lower efficiency than a standalone HEPA purifier because the HVAC system only runs when the thermostat calls for heating or cooling. A dedicated air purifier runs continuously and achieves HEPA-level filtration (99.97% of particles at 0.3 microns). For homes with allergies, pets, or poor outdoor air quality, both together provide the best protection.
My air quality indicator stays red. Is the purifier broken?
Probably not. A persistently red indicator after 4+ hours on maximum speed usually means one of three things: the purifier is undersized for the room (check your CADR vs. room size), there’s an active pollution source overwhelming the unit (open window, cooking, wildfire smoke, construction), or the air quality sensor itself needs cleaning. Try moving the purifier to a smaller, sealed room and running it for an hour. If it reaches green in the smaller room, the issue is sizing or an ongoing pollution source, not a defective unit. Our Consumer Reports ratings guide includes reliability data for common models.
Related Reading
Now that your purifier is up and running, these guides will help you get the most from it:
- Air Purifier Placement Guide for Maximum Effectiveness, the physics of airflow and room dynamics
- How to Test If Your Air Purifier Is Actually Working, hands-on verification methods
- Air Purifier Buying Guide for First-Time Buyers, choosing the right model and CADR
- Seasonal Allergy Air Purifier Guide, optimizing settings for pollen season
- Best Air Purifier Brands Ranked, comparing manufacturer reliability and support
- Air Purifier VOCs and Formaldehyde Guide, if chemical off-gassing is your concern
- Air Purifier vs. Opening Windows, when ventilation helps and when it hurts
Disclosure: This article contains affiliate links. If you purchase through our links, we may earn a commission at no additional cost to you. This helps us keep our guides free and independent. We only recommend products we’ve personally evaluated or that meet our testing criteria. See our full affiliate disclosure for details.
Related Articles
Air Purifier for COVID: What the Research Actually Says
Do HEPA air purifiers really protect against COVID? We review EPA guidance, 2025 research studies, and what actually works for virus protection.
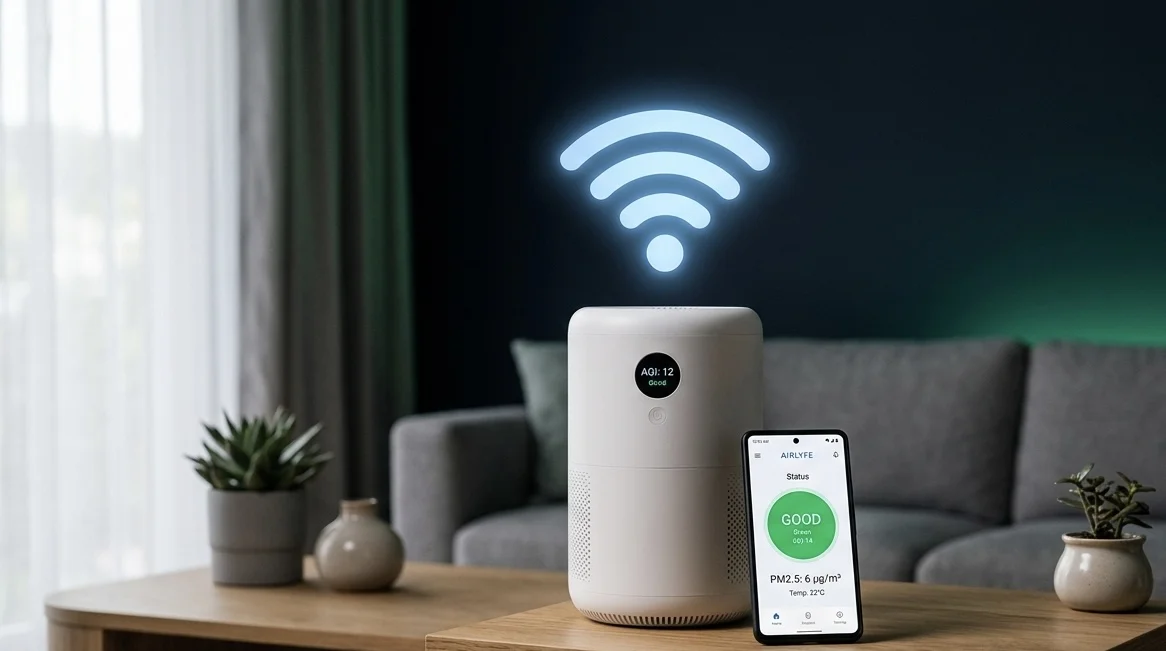
Air Purifier WiFi: Is It Worth Paying Extra for Smart Features?
Is WiFi on an air purifier worth $50-100 more? We compare smart vs non-smart models from Levoit, Coway, Winix, and Dyson to help you decide.
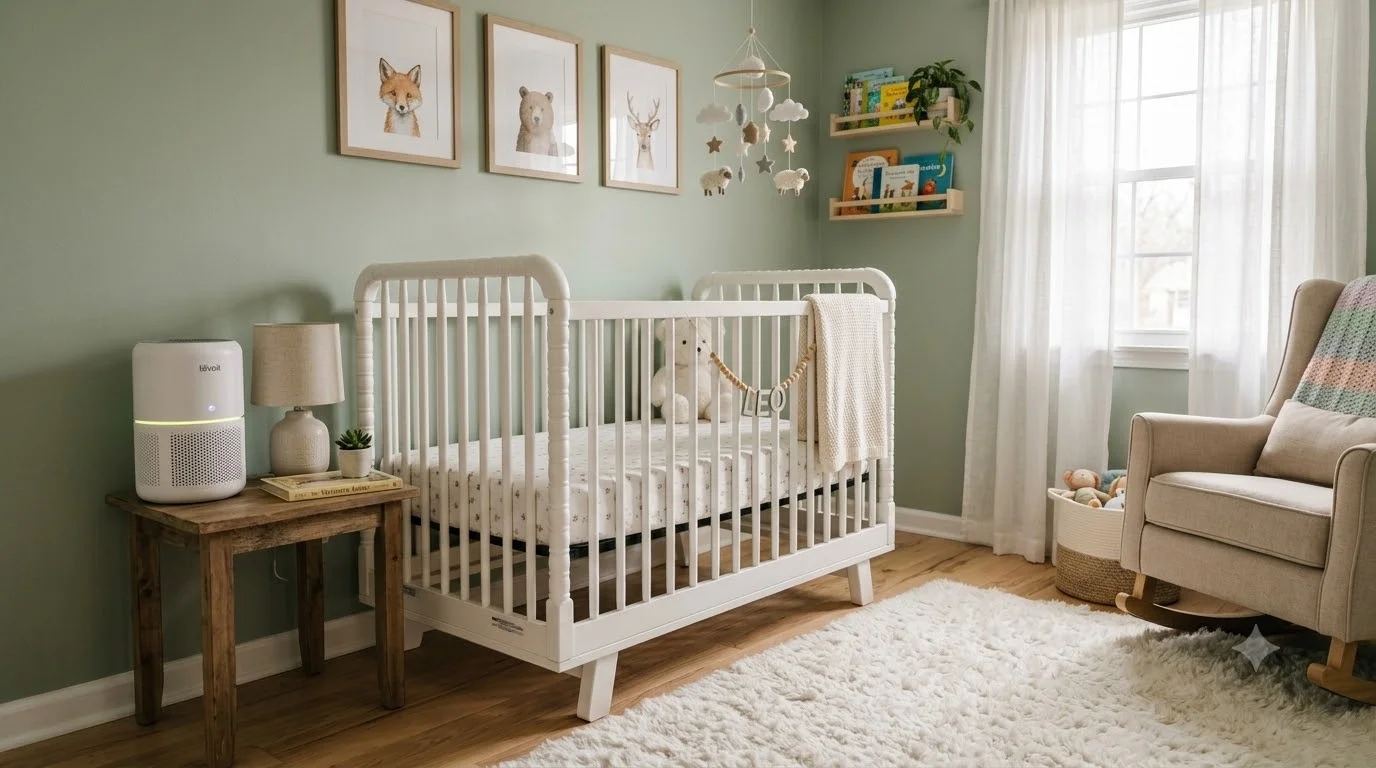
New Nursery Furniture Smells? What You Need to Know About VOCs
New nursery furniture off-gasses VOCs and formaldehyde. What the research says about protecting your baby, and what actually helps.
Best Air Purifier for Weed Smoke From Neighbors (2026)
Neighbor's weed smoke seeping into your apartment? We tested air purifiers with heavy carbon filters to find which ones actually eliminate marijuana odor and particles.
AHAM AC-5 Air Purifier Test: What It Means and Why It Matters
What is the AHAM AC-5 test for air purifiers? We explain how AHAM Verifide testing works, what CADR ratings mean, and why it matters when choosing an air purifier.
🛒 Products Mentioned
As an Amazon Associate, we earn from qualifying purchases.
Runs side-by-side purifier comparisons, long-term ownership reports, and filter cost analysis.
View all articles by David →